Friday, September 29, 2023

Kenmore 385.16130200 Sewing Machine Instruction Manual


Kenmore 385.16130200 Sewing Machine Instruction Manual.

Includes:
Threading the machine.
Winding bobbin.
Adjusting thread tension.
Changing needle.
Presser foot types.
Using feet and attachments.
Learning The Stitches.
Extension table.
Raise and lower feed dogs.
Zigzag.
Button sewing.
Automatic buttonhole.
Monogramming.
Serging.
Stretch stitch.
Cleaning Shuttle And More.
Replacing light bulb.
Trouble Shooting.

100 page owners/instruction manual.

Model: 16130200 (385.16130200)

English, Spanish, and French languages

Kenmore 385.16130200 Sewing Machine Instruction Manual.


You can find more Kenmore sewing manuals here.

Kenmore sewing machine manuals

manualsoncd.com

sewingpartsplus.com


Thursday, September 28, 2023

White 999 Sewing Machine Instruction Manual


White 999 Sewing Machine Instruction Manual.

Includes:
Threading your machine.
Changing needle.
Winding and threading the bobbin.
Adjusting thread tension.
Change presser feet.
Fabric, thread, and needle table.
Pattern selection dial.
Detaching extension table.
Drop feed lever.
Straight stitch.
Zigzag.
Blind hem stitch.
Overlocking.
Zipper sewing.
Making buttonholes.
Accessories.
Trouble chart
Changing light bulb.
Cleaning.
Oiling machine.

43 page instruction/owners manual.

White 999 Sewing Machine Instruction Manual.

More White sewing machine manuals here


White sewing machine manuals

manualsoncd.com      

sewingpartsplus.com


Wednesday, September 27, 2023

Kenmore 158.14300 – 158.14301 Sewing Machine Manual


Kenmore 158.14300 – 158.14301 Sewing Machine Manual.

Includes:
Machine threading.
Changing needle.
Bobbin winding.
Thread tension adjustment.
Stitch width control.
Special stitch dial.
Feed dog control.
Buttonhole attachment.
Zigzag stitching.
Face cover plate.
Take-up lever.
Clutch knob.
Multi-purpose needle plate.
Feed dog control.
Zipper application.
Checking performance problems checklist.
Oiling your machine.
Cleaning.
Much more!

49 page instruction/owners manual.

Kenmore models:
158.1430
158.14300
158.14301

Kenmore 158.14300 – 158.14301 Sewing Machine Manual.


Starting To Sew Hints

Now that you are familiar with the controls on your machine and with the accessories provided for the machine, you are ready to start to sew with your new Kenmore sewing machine.
Below are some good habits to follow each time you sit down to sew:

1. Test the needle – it should be straight, properly set and sharp on the point. It should be the
correct size for the fabric and thread being used. Do not be afraid to change your needle
frequently. Many of the new fabrics made of synthetic blends tend to dull the needles
more easily than fabrics made of natural fibers.

2. Before placing the material on the machine, see that the ends of the threads have
been drawn about 4 inches to the rear of the machine. Hold on to threads during the
sewing of the first 3 or 4 stitches of the seam.

3. Test the machine stitch on a scrap of fabric you plan to use. The fabric should be
double thickness. Adjust the machine for the length of stitch and tension suitable to your
fabric.

4. Fabric should be placed under the presser foot with the bulk of the material to
the left of the needle and the right edge of the material placed on the 5/8″ seam marking on
the needle plate when making a simple seam.

5. Run the machine at a slow even speed. The more pressure you put on the speed control,
the faster the machine will sew.

6. Fasten each seam by back tacking at the beginning and end of the seam.

7. Always finish sewing each seam with the needle at its highest point.

8. Guide the fabric gently with your hand in front of the needle. Never pull or hold
the fabric in such a way that the normal feeding is altered.

9. When turning the hand wheel manually, always turn it toward you.


You can find other Kenmore sewing machine manuals here.


Kenmore sewing machine manuals

manualsoncd.com

sewingpartsplus.com


Tuesday, September 26, 2023

Husqvarna 1250 Sewing Machine Instruction Manual # 1+


Husqvarna 1250 Sewing Machine Instruction Manual # 1+.

Includes:
Needle threader.
Bobbin winding.
Memory clear.
Reverse feed button.
Thread cutter.
Thread tension dial.
Threading for twin needles.
Cassettes A, B, D, L.
Changing the needle.
Automatic buttonholes.
Seam and overcast.
Changing the light bulbs.
Lowering feed teeth.
Cursor buttons.
Cleaning.
Much more!

56 page instruction/owners manual.

Husqvarna 1250 Sewing Machine Instruction Manual # 1+.

Model 1+ 1250

Husqvarna Sewing Machine Manuals

 
Always start by checking the needle

An important part that needs to be changed from time to time is the needle. Always start with a new needle as soon as you discover that a seam is not what you expected. Test sew on a scrap of the fabric you are sewing.
Check that you have chosen the correct needle and see that it is cor­rectly inserted.

Unattractive stitches

Thread tension is not correct. See page 12.
Make sure that the thread is not blocked. Certain thread spools are unsuitable for spooling from the hori­zontal spool pin. Try instead with the vertical spool pin.
Your machine may be incorrectly threaded. The correct threading is shown on page 9.
Wrong bobbin thread. It should be of the same thickness as the upper thread.
Bobbin incorrectly inserted into the bobbin case. See page 11.

Needle breaks

You may have helped the machine to feed by pulling the fabric, causing the needle to strike against
the stitch plate and break.

Upper thread breaks

Check the thread spool to see that it has not caught in any way.
The needle eye may have sharp edges which cut the thread. If so, change the needle. See page 14.
Upper thread is incorrectly threaded. See page 9.
The upper thread may have too much tension. Refer to page 12.
The thread is knotted.
The hole in the stitch plate may be chipped and have sharp edges.
Slight damage to the stitch plate can possibly be polished or filed but we recommend that you
replace it.


Husqvarna sewing machine manuals

Viking sewing machine manuals

manualsoncd.com

sewingwithsinger.com


Monday, September 25, 2023

Eldredge Model P Sewing Machine Instruction Manual


Eldredge Model P Sewing Machine Instruction Manual.

Includes:
Machine threading.
Adjusting ball bearing stand.
To remove the shuttle.
Needle chart.
Sewing guide.
Regulate feed.
Bobbin winding.
Face plate.
Spooler step spring.
Flywheel.
Take-up rivet.
Belt replacement.
Regulate the tension.
Parts diagram.
Oiling.
Much more!

30 page instruction/owners manual.

Eldredge Model P Sewing Machine Instruction Manual.

Eldredge, Free-Westinghouse, Montgomery Ward
Reversew, Long shuttle, National E, Eldredge E


THE BELT

Your machine works best with as loose a belt as will serve to wind the bobbin.
If too loose, disconnect the coupling and cut a little off from one end, about half an inch.

To run on the belt after it has been taken off the pulley wheels to be shortened, or to
allow the head to turn back for oiling or cleaning, it is only necessary to lay the
belt in the groove of the hand wheel, and then turn the driving wheel of the stand towards you and draw the belt across the inside edge of the pulley rim, on which there is a little finger or projection that acts as a belt replacer.
As the wheel revolves towards you this finger will catch the belt and run it into its proper place in the groove.

SKIPPED STITCHES
These are sometimes caused by the needle being too small for thread, or not being set up as
high in the bar as it will go. Also by the needle being bent, or by dirt or lint collecting in the groove cut for the needle in the face of the
shuttle race; also by the needle being set in wrong with a long groove toward shuttle-always have
short groove towards the shuttle.

BREAKING THE UPPER THREAD
May be caused by the needle not being properly set, the machine not threaded correctly, the
upper tension too tight, the thread uneven and the needle too small for it, the eye
of the needle being too sharp, the presser foot is attached to the machine so that the
needle rubs against it, or by a sharp place or burr being formed on the needle plate
around the needle hole, by needles being allowed to strike it.
Breaking of thread is also caused by using a needle of improper dimensions; one not made for
this machine, or through the upright part of the shuttle carrier spring· breaking or working
loose and catching the upper thread as it loops around the shuttle.

BREAKING THE LOWER THREAD
May be caused by too much tension in the shuttle, by the bobbin being wound too full so that the
thread at the end slips over the bobbin.in the shuttle, by the thread being caught in
the shuttle slide plates or by a burr formed in needle plate hole through the needle
striking it.
The shuttle slides should always be kept tightly close when operating the machine, the bobbin should never be wound so full as to prevent its being turned freely in the shuttle.

TO REGULATE THE FEED
For ordinary work, the feed requires no change and should remain as when received. In sewing very thick and soft, spongy goods it may be necessary to raise it a little. This is done very easily with this machine by loosening the little set screw in feed lever adjustment marked
“F” on cut showing the working parts of the machine on page 4, and sliding the feed lever a trifle to the right. This has the effect of raising the feed bar and with it the feed proper, and yet there is no possibility of getting the feed out of level, a very common source of trouble with other machines.
When the feed is raised to the point desired, fasten the set screw again firmly, to lower the feed slide lever to the left.


Sunday, September 24, 2023

Janome 6300 Memory Craft Sewing Machine Service-Parts Manual


Janome 6300 Memory Craft Sewing Machine Service-Parts Manual.

Adjust:
* Bobbin winder.
* Timing belt.
* Zigzag timing.
* Speed control slider.
* Feed dog height.
* Hook cover plate.
* Tension release mechanism.
* Front bracket.
* Thread supply control lever.
* Pre-tension spring.
* Stretch stitch feed balance.
* Clutch base.
* Connecting block.
* Buttonhole lever position.
* Printed circuit board.
* Diagnosis chart.
* Parts list with diagrams
* Much more!

48 page service manual plus a 25 page detailed parts-diagrams manual.


PLEASE NOTE***

This is a Service Manual.
If you need the instruction manual, you can find it here.


Janome 6300 Memory Craft Sewing Machine Service-Parts Manual

Janome MC6300, 6300P


You can find more Janome service manuals here.


Janome sewing machine service manuals

manualsoncd.com

sewingpartsplus.com     


Friday, September 22, 2023

Kenmore 148.12170 Sewing Machine Instruction Manual


Kenmore 148.12170 Sewing Machine Instruction Manual.

Includes:
Machine threading.
Changing the needle.
Bobbin winding.
Adjust tension.
Changing presser feet
Stitch width control.
Presser foot lever.
Blind stitch knob.
Thread cutter.
Automatic zigzag.
Sewing on buttons.
Adjusting your machine for good stitches.
Fix common sewing problems.
Oiling your machine.
Sewing light.
Cleaning.
Much more!

27 page instruction/owners manual.

Kenmore 148.12170 Sewing Machine Instruction Manual.

Models:
1217
148.1217
148.12170


ADJUSTING YOUR SEWING MACHINE FOR GOOD STITCHES

When your sewing machine does not sew a properly locked stitch, check the following:

1. Insert a new needle of the correct size for the thread and fabric you are using. Consult the chart on page 5 for needle size.

2. The upper and bobbin thread should be the same thread.

3. Check threading carefully. See page 8-9.

4. Check the thread tension balance.
Use mercerized thread and a correct size needle for the fabric you are using: Do not try to test with synthetic thread as it will not break. Begin with a
full bobbin, properly threaded into the case. Set the stitch length at about 12 stitches perinch. Fold a 6-inch square of your fabric in half diagonally, forming a triangle. Make a line of stitching ½” from the fold.

Check to see if any of the following:
a. The seam is puckered – then both tensions are too tight.
b. Bottom thread is looped – tighten upper thread tension, and repeat test.
c. When top thread lays on top of fabric-loosen upper thread tension, repeat the test. Grasp the stitching and pull evenly and firmly until one or both threads break.
a. Both threads break – tensions are balanced.
b. When neither thread breaks – both tensions are too loose.
c. If upper thread breaks – loosen upper tension.
d. If lower thread breaks – tighten upper tension.
Both threads do not have to break at the same place, but they should break on the same snap.

Bobbin tensions may also be reset by this procedure. Start with a loose bobbin thread tension.

Tighten the spring screw gradually until the bobbin case and full bobbin can be gently lifted from your hand by the end of the bobbin thread.

More Kenmore sewing machine manuals located here.


Kenmore sewing machine manuals

manualsoncd.com

sewingpartsplus.com


Thursday, September 21, 2023

White 6477 Sewing Machine Instruction Manual


White 6477 Sewing Machine Instruction Manual.

Includes:
Machine threading.
Bobbin winding.
Changing needle.
Thread tension adjustment.
Sewing in reverse.
Needle chart.
Making buttonholes.
Sewing on buttons.
Pattern variations.
How to use accessories.
Telescopic spool pins.
Stitch length and width.
Cover release button.
Change the motor belt.
Replace the light bulb.
Check for smooth sewing helpful hints chart.
Oiling machine.
Cleaning and oiling shuttle.
Much more!

36 page instruction/owners manual.

White 6477 Sewing Machine Instruction Manual.


CHECK UP FOR SMOOTH SEWING

Although your sewing machine is designed for maximum efficiency, should any of the following difficulties occur they can be remedied with minor adjustments.

Upper Thread Breaks.
Be sure the needle is inserted properly. Check on the correct way to thread the machine. Use correct needle size for thread.
Do not have upper tension too tight.

Lower Thread Breaks.
Check the correct method of threading the bobbin case.
Be sure the lower tension is not too tight.

Needle Breaks.
Do not tug or pull on the fabric while sewing as this will bend and eventually break the needle.
Be sure the presser foot is firmly attached to the bar. Be sure the needle clamp screw is tightened securely.

Skipped Stitches.
Do not use a blunt or bent needle. Insert needle correctly.
Use the correct needle size for thread.
Be sure pressure on the foot is sufficient when sewing heavy fabrics.

Stitches Loop.
Make sure tensions are properly balanced and that the machine is threaded correctly.

Machine Binds.
Clean thread dust and lint from hook, shuttle, and race.
If the condition continues, it may be that the machine is gummy with oil. Apply
kerosene to oil holes, run rapidly for a while, and wipe dry.
Then lubricate again with fine sewing machine oil.

You can find more White sewing machine manuals here.


Wednesday, September 20, 2023

Montgomery Ward UHT-J1460D Sewing Machine Manual


Montgomery Ward UHT-J1460D Sewing Machine Manual.

Includes:
Machine threading.
Bobbin winding.
Thread tension adjustment.
Zigzag sewing.
Stitch width knob.
Sew-darn knob.
Zipper insertion.
Reverse stitch button.
Stop motion knob.
Thread cutter.
Buttonholer.
Twin needle lever.
Large thread guide.
Cam lever.
Motor belt.
Sewing light bulb.
Cleaning.
Much more!

69 page instruction/owners manual.

Montgomery Ward UHT-J1460D Sewing Machine Manual.

UHT J 1460D


BOBBIN DOES NOT WIND PROPERLY
• Machine not threading correct­ly for winding
• Thread guide discs not properly set
• Bobbin spindle not positioned correctly
• Bobbin winder stop not positioned correctly


UPPER THREAD BREAKS

• Incorrect Needle length
• Needle too fine for thread
• Bent or blunt needle
• Needle inserted incorrectly
• Tension on upper thread too tight
• Poor quality or knotted thread
• Stitch hole in needle plate rough or sharp
• Check for needle rubbing against presser foot
• Starting machine at full speed
• Sharp edges on needle eye
• Machine not properly threaded
• Thread is caught in a slit of
the spool or under the spool


MACHINE MAKES LOOSE STITCHES
OR LOOPS
• Machine not property threaded
• Tension not adjusted properly
• Thread check- spring bent or broken
• Bobbin and upper thread not of the same type or size
• Needle point damaged


BOBBIN THREAD BREAKS

• Bobbin case threaded incorrectly
• Bobbin wound unevenly or too full
• Poor quality thread
• Stitch hole in needle plate rough or sharp
• Bobbin thread tension too tight
NOTE: If bobbin thread cannot be pulled up, needle may be improperly
inserted.


NEEDLE BREAKS
• Needle is inserted incorrectly
• Incorrect needle length
• Needle is bent
• Wrong size needle or thread for fabric being sewn
• Presser foot or attachment not securely fastened to presser bar
• Pulling fabric while sewing
• Check to see if needle is hitting pins
NOTE: Do not move Stitch Width Knob, or Buttonholer /Needle Position
Knob with needle in the fabric.


MACHINE DOES NOT FEED PROPERLY
• Stitch length knob set too close to “O”
• Presser foot not down completely
• Pressure on presser foot insufficient
• Sew- Darn knob improperly
adjusted


More helpful hints contained in manual.


Montgomery ward manuals

manualsoncd.com

sewingpartsplus.com


Tuesday, September 19, 2023

Kenmore 158.840 – 158.84 Sewing Machine Instruction Manual


Kenmore 158.840 – 158.84 Sewing Machine Instruction Manual.

Includes:
Threading machine.
Winding the bobbin.
Changing the needle.
Adjusting tension.
Setting stitch length.
Needle and thread table.
Decorative stitching.
Blind stitching.
Sewing buttons.
Inserting the disk.
Overcast and applique.
Adjusting for good stitches.
Cleaning and oiling.
Replacing belt.
Common problem solving.

31 page instruction/owners manual.

Kenmore 158.840 – 158.84 Sewing Machine Instruction Manual.


ADJUSTING YOUR SEWING MACHINE FOR GOOD STITCHES

When your sewing machine does not sew a properly locked stitch, check the following:

1. Insert a new needle of the correct size for the thread and fabric you are
using. Consult the chart on page 5 for needle size.

2. The upper and bobbin thread should be matched in size and type.

3. Check threading carefully. See page 9.

4. Check the thread tension balance. Use mercerized thread, and a correct size
needle for the fabric you are using. Do not try this test with synthetic
thread as it will not break.

Begin with a full bobbin, properly threaded into the case. Set the stitch length
at about 12 stitches per inch. Fold a 611 square of your fabric in half
diagonally, forming a triangle. Make a line of stitching ½” from fold.

Check if:
a· Seam is puckered · both tensions are too tight.
b. Bottom thread lays on the fabric – tighten upper thread tension,
and repeat test. See page 12, Figure 3.
If the top thread lays on the fabric – loosen upper thread tension, and repeat test.
See page 12, Figure 2.
Grasp the stitching and pull with a snap to make threads break.
a. Both threads break – tensions are balanced.
b. Neither thread breaks – both tensions are too loose.
c. Upper thread breaks – loosen upper tension.
d. Lower thread breaks – tighten upper tension.
Both threads do not have to break at the same place, but they should break
on the same snap.

Bobbin tension may be reset by the following procedure:

Start with a loose bobbin thread tension.
Tighten the spring screw gradually until the bobbin case and full
bobbin can be gently lifted from your hand by the end of the bobbin thread.


You can find more Kenmore sewing machine manuals here


Kenmore sewing machine manuals

manualsoncd.com

sewingpartsplus.com


Monday, September 18, 2023

Singer 14u344b Sewing Machine Instruction Manual


Singer 14u344b Sewing Machine Instruction Manual.

Includes:
Changing needles.
Machine threading.
Adjusting thread tension.
Principal parts.
Stitch diagram.
Correct balance of the 4 threads.
Seam guidelines.
Thread guides.
Throat plate.
Cone adapter.
Motor cover.
Replace stationary knife.
Troubleshooting.
Oiling machine.
Change the light bulb.
Cleaning.
Much more!

45 page instruction/owner's manual.

Singer 14u344b Sewing Machine Instruction Manual.


Singer sewing machine manuals

Singer service manuals

manualsoncd.com

sewingpartsplus.com    

Sunday, September 17, 2023

Necchi 542 544 Lydia 3 Sewing Machine Instruction Manual


Necchi 542 544 Lydia 3 Sewing Machine Instruction Manual.

Includes:
Machine threading.
Bobbin winding.
Thread tension adjustment.
Buttonholes in any lengths.
Stretch zigzag.
Elastic overlock.
Double seams.
Zipper insertion.
Balance wheel.
Reverse sewing lever.
Hook shutter.
Speed regulator.
Rotary hook.
Oiling.
Cleaning.
Much more!

45 page instruction/owners manual.

Necchi 542 544 Lydia 3 Sewing Machine Instruction Manual.

NOTE***
Please compare your machine with the pictures provided.


More Necchi instruction manuals here.


Necchi Instruction Manuals

manualsoncd.com

sewingwithsinger.com


Saturday, September 16, 2023

Janome Skyline S6 Sewing Machine Instruction Manual


Janome Skyline S6 Sewing Machine Instruction Manual.

Includes:
Function keys.
LCD screen.
Cursor key.
Machine operating buttons.
Bobbin winding.
Dropping the feed dog.
Thread tension adjustment.
Pattern combination.
Free motion quilting.
Machine threading.
Needle plate replacement.
Zipper sewing.
Buttonholes.
Monogramming.
Zigzag stitch.
Troubleshooting.
Cleaning.
Much more!

96 page complete instruction manual.


The Janome Skyline S6 Sewing Machine Instruction Manual is your comprehensive guide to mastering every aspect of this versatile sewing machine.

With 96 pages packed full of detailed instructions, this manual covers everything you need to know, from basic tasks like machine threading and bobbin winding to more advanced techniques like free motion quilting and monogramming.

Navigate your machine's features with ease using the Function keys and the LCD screen, guided by the Cursor key for precise selections. Explore the wide range of capabilities, from crafting perfect buttonholes to sewing zippers effortlessly.

Troubleshooting tips are included to help you tackle any challenges you may encounter.

Learn how to drop the feed dog for creative free motion work and master pattern combinations for endless design possibilities.

The manual also guides you through needle plate replacement and offers insights into the zigzag stitch function. And that's not all – it even covers essential maintenance tasks, ensuring your machine stays in top shape.

Whether you're a seasoned seamstress or a beginner, this manual is an indispensable companion, providing clear instructions and detailed illustrations to make your sewing experience seamless and enjoyable.


Friday, September 15, 2023

Dressmaker FA-782 Sewing Machine Instruction Manual


Dressmaker FA-782 Sewing Machine Instruction Manual.

Includes:
Threading your machine.
Bobbin winding.
Changing needle.
Tension adjustment.
Drop feed device.
Pattern select lever.
Reverse feed knob.
Feed dog.
Adjusting presser foot pressure.
Chain stitch thread guide.
Manual zigzag.
Buttonhole sewing.
Common problem solving.
Belt tension adjustment.
Cleaning.
Oiling.
Much more!

56 page instruction/owners manual.

Deluxe


The Dressmaker FA-782 Sewing Machine Instruction Manual covers a comprehensive range of topics to help you master your machine.

Inside, you’ll find step-by-step instructions on key functions such as threading your machine, winding the bobbin, changing the needle, adjusting tension, and utilizing the drop feed device.

The manual also guides you through the pattern selection lever, reverse feed knob, and feed dog settings.

You’ll learn how to adjust presser foot pressure, use the chain stitch thread guide, and execute manual zigzag and buttonhole sewing.

Additionally, the manual offers solutions to common problems, explains belt tension adjustment, and provides guidance on cleaning and oiling your machine to ensure it runs smoothly.

With this English-language manual, you’ll have all the information you need to make the most of your Dressmaker FA-782 Sewing Machine.


Dressmaker sewing machine owners manuals


manualsoncd.com

sewingwithsinger.com


Thursday, September 14, 2023

Brother J-A 28 Sewing Machine Instruction Manual


Brother J-A 28 Sewing Machine Instruction Manual.

Includes:
Threading machine.
Change the needle.
Bobbin winding.
Thread tension adjustment.
Needle and thread size.
How to insert pattern keys.
Make buttonholes.
Proper height of feed dog.
Change light bulb.
Oiling.
Cleaning.
More!

20 page instruction/owners manual.


Please Note**
This manual has yellowing on the pages due to age.


Brother J-A 28 Sewing Machine Instruction Manual.

JA28
JA 28
J-A-28
J-A28


Brother sewing machine manuals

manualsoncd.com

sewingwithsinger.com


Wednesday, September 13, 2023

Elgin Model 2468 Sewing Machine Instruction Manual


Elgin Model 2468 Sewing Machine Instruction Manual.

Includes:
* Threading machine.
* Inserting needle.
* Winding the bobbin.
* Changing needle.
* Adjusting thread tensions.
* Setting stitch length.
* Pressure and feed adjustment.
* Pattern Cams.
* Zigzag stitch patterns.
* Embroidery sewing.
* Portable and cabinet installations.
* Cleaning and oiling the shuttle.
* Much more!

32 page instruction manual.

Great diagrams!

Elgin Model 2468 Sewing Machine Instruction Manual.

This machine was also branded as a Universal sewing machine.


Elgin sewing machine manuals

manualsoncd.com

sewingwithsinger.com


Tuesday, September 12, 2023

Koz Sewing Machine Instruction Manual


Koz Sewing Machine Instruction Manual.

Includes:
Threading machine.
Bobbin winding.
Tension adjustment.
Adjusting stitch lengths.
Pattern cams.
Sewing designs.
Buttonholes.
Blind hem stitch.
Embroidering with a hoop.
Features and parts.
Oiling machine.
Accessories.
Much more!

28 page instruction/owners manual.

Koz Sewing Machine Instruction Manual.


manualsoncd.com

sewingpartsplus.com       


Sunday, September 10, 2023

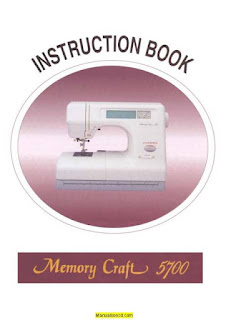
Janome 5700 Memory Craft Sewing Machine Instruction Manual


Janome 5700 Memory Craft Sewing Machine Instruction Manual.

Includes:
Threading machine.
Bobbin winding.
Changing needles.
Adjusting thread tensions.
Pressure dial.
Selecting needle and thread.
Stitch length.
Sensor buttons.
Zigzag.
Blind stitch hemming.
Embroidery.
Monogramming mode.
Buttonholes.
Replacing light bulb.
Cleaning bobbin holder and hook race.
Troubleshooting sewing problems.
Much More!

60 page instruction/owner’s manual.

Janome 5700 Memory Craft Sewing Machine Instruction Manual.

MC5700


Janome Instruction Manuals

New Home Instruction Manuals

manualsoncd.com

sewingpartsplus.com      


Thursday, September 7, 2023

Kenmore 385.15108200 Sewing Machine Instruction Manual


Kenmore 385.15108200 Sewing Machine Instruction Manual.

Includes:
Machine threading.
Bobbin winding.
Multiple zigzag stitch.
Button sewing.
Thread tension adjustment.
Thread take-up lever.
Reverse stitch control.
Controlling sewing speed.
Thread cutter.
Replacing shuttle assembly.
Zipper insertion.
Changing needle.
Setting spool pins.
Replacing light bulb.
Troubleshooting.
Cleaning.
Much more!

79 page instruction/owners manual.

English, Spanish and French languages.

Kenmore 385.15108200 Sewing Machine Instruction Manual.


Kenmore sewing machine manuals

manualsoncd.com

sewingpartsplus.com


Wednesday, September 6, 2023

How to Thread Your Janome New Home DX2015 Sewing Machine


How to Thread Your Janome New Home DX2015 Sewing Machine.


Note: Before starting, ensure that the machine is turned off and unplugged for safety.

Threading the machine:

Take the spool pin holder and insert it into the hole at the top of the machine.

Raise the thread take-up lever to the highest point by turning the handwheel towards you.

Raise the presser foot with the presser foot lifter and pass the thread in the order from 1 to 8.

1. Pass the thread through the top cover thread guide.
2. Draw the thread around the thread guide and down into the tension.
3. Then down around the check spring holder.
4. Firmly draw the thread from left to right over the take-up lever and down into the take-up lever eye.
5-6. Then down through the lower thread guide.
7. Slide the thread behind the needle bar thread guide on the left.
8. Thread the needle from front to back.

4. Final Steps:

a. Hold the upper thread and manually turn the handwheel toward you to lower the needle into the fabric.
b. Pull the upper thread slightly to bring up the bobbin thread.
c. Hold both threads together and pull them towards the back of the machine, under the presser foot.
d. Your Janome New Home DX2015 Sewing Machine is now threaded and ready to sew!

Remember to consult the machine’s user manual for additional guidance and specific instructions related to your model. Happy sewing!

How to Thread Your Janome New Home DX2015 Sewing Machine


You can find the complete instruction manual here.


Tuesday, September 5, 2023

Janome 400e Memory Craft Sewing Machine Instruction Manual


Janome 400e Memory Craft Sewing Machine Instruction Manual.

Includes:
Machine operating buttons.
Machine threading.
Bobbin winding.
Embroidery Hoops.
Function keys.
Rotating a pattern.
Zooming in the editing window.
On-screen help.
Deleting a file or folder.
Hoop back key.
Selecting a pattern.
Customizing the display colors.
Machine setting mode.
Setting the spool of thread.
Troubleshooting.
Cleaning.
Much more!

65 page instruction/owners manual.

Janome 400e Memory Craft Sewing Machine Instruction Manual.


Janome Instruction Manuals

New Home Instruction Manuals

manualsoncd.com

sewingpartsplus.com     


Followers

Blog Archive